

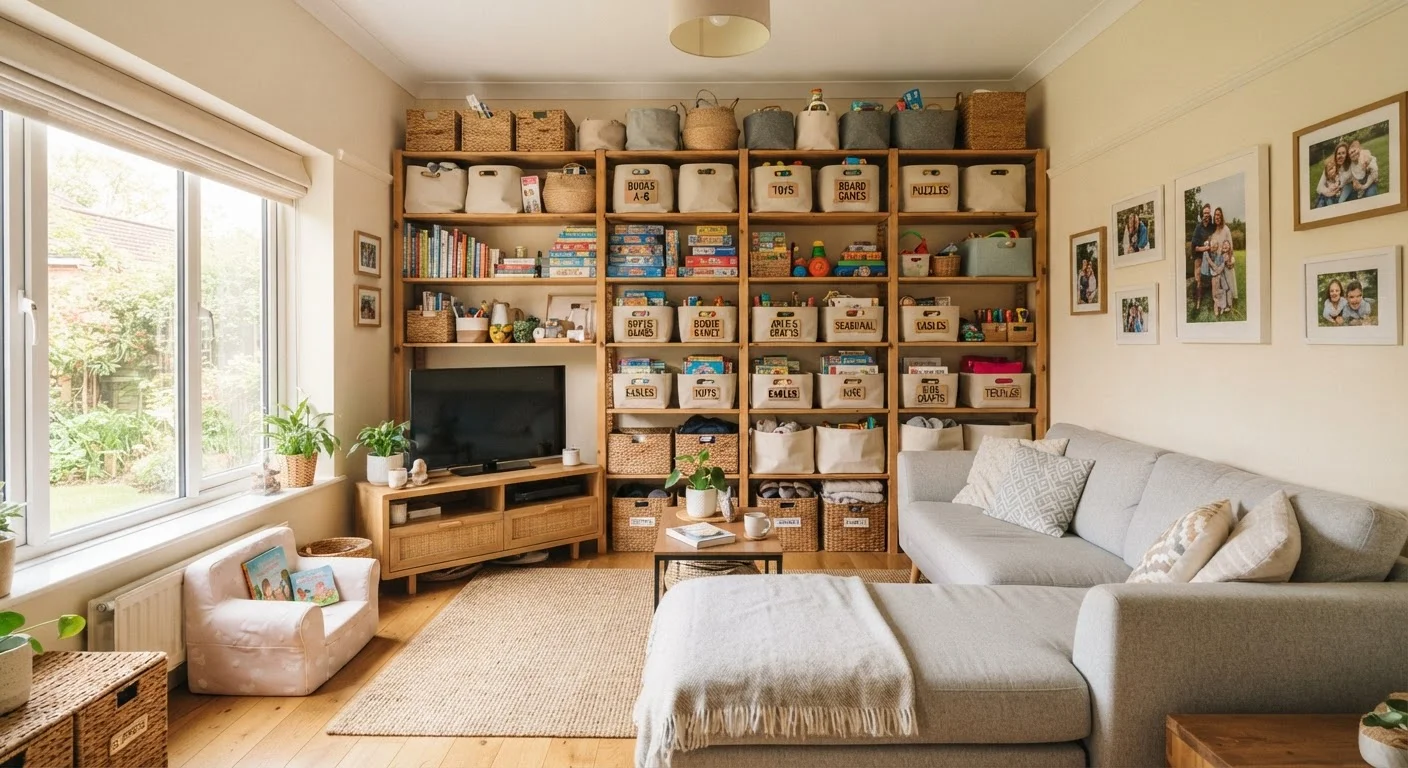
Why Vertical Space Goes Unused - and What That Costs You
When a home feels cluttered, most families respond by adding more bins, more baskets, or more furniture at floor level. What they rarely consider is the several feet of perfectly usable space that exists above eye level on almost every wall. The average room with 8-foot ceilings has roughly 6-7 feet of vertical wall space that storage and furniture simply never reach.
Leaving that space idle isn't just a missed opportunity - it actively makes homes feel smaller and harder to keep organized. Floor-level clutter is visible clutter, and it creates the impression of disorder even when individual items are reasonably tidy. Moving storage upward clears sightlines and creates the open, airy feel most families associate with a well-organized home.
The good news: using vertical space effectively rarely requires renovation. In most cases, it means adding shelves, hooks, or organizers using tools and materials available at any hardware store. For families working with limited square footage or tight budgets, this approach is often the highest-impact organizing strategy available. For more ideas on keeping those gains from slipping, see our article on household rules that prevent clutter from returning.
Measuring Tape
Measures wall height, door width, and shelf spacing to plan storage placement accurately.
Stud Finder
Locates wall studs so shelves and organizers can be anchored safely.
Level
Ensures shelves and rails are mounted straight to prevent items from sliding.
Drill with Bits
Creates pilot holes and drives screws when mounting brackets, hooks, or rods.
Over-the-Door Organizer
Hangs over standard doors to add pockets or hooks without drilling.
Floating Shelf Brackets
Support wall-mounted shelves in any room where additional surface storage is needed.
Room-by-Room: Where Vertical Storage Makes the Biggest Difference
Not every room offers the same vertical potential, and some areas respond better to specific approaches than others.
- Kitchen: Above-cabinet tops, tall pantry shelving, and wall-mounted spice rails free up counter space - the most contested surface in most family homes.
- Bathroom: Over-toilet shelving units and medicine cabinet alternatives mounted above the sink provide storage in a room where floor space is nearly nonexistent.
- Entryway: Wall-mounted hook rails, tall coat stands, and upper shelving for seasonal items can transform a chaotic drop zone. Our entryway organization guide covers this room in depth.
- Children's bedrooms: Low shelving for active toys paired with higher shelving for books and display items creates a usable, age-appropriate system that grows with the child.
- Living room: Floor-to-ceiling shelving or a gallery-style arrangement of smaller shelves makes a living room feel curated rather than crowded.
If you're deciding between open shelves and closed cabinet storage as you plan, comparing the trade-offs before you commit can save time and money.
Anchor Shelves and Heavy Organizers Safely
Any shelf, rod, or heavy organizer mounted to a wall must be secured into wall studs or with appropriate hollow-wall anchors rated for the intended load. Improperly anchored shelving can fall and cause injury. If you are unsure about your wall type or the anchoring method required, consult a hardware store professional or a qualified handyperson before proceeding.
Once you've mapped the vertical opportunities in your home, follow the step-by-step process below to put them to work.
What you will need
Step-by-Step: Putting Vertical Storage in Place
Audit every room for unused vertical space
Walk through each room with your measuring tape and notepad. Look above existing furniture, along bare walls, and on the backs of closet and pantry doors. Note the height from the floor to the ceiling in each space, then estimate how much of that height is currently occupied by storage or furniture. Most families find that only the bottom third of their wall height is in active use.
Pay special attention to areas above the refrigerator, above bathroom vanities, above washer/dryer units, and inside bedroom closets. Write down measurements for any wall section that is at least 12 inches wide and unobstructed.
Sort your belongings by access frequency
Before adding storage, decide what will go where. Group items into three categories: daily use (countertop or eye-level height), weekly use (mid-level shelves, reachable without a step stool), and rarely used (high shelves, above-cabinet tops, high closet rods).
This sorting step prevents a common mistake: storing everyday items so high they become inconvenient to retrieve, which leads to clutter piling up on lower surfaces instead. Seasonal décor, extra linens, and archived paperwork are ideal candidates for high vertical storage.
Add floating shelves to bare wall sections
Floating shelves (shelves mounted directly to the wall with hidden or visible brackets) are one of the most versatile vertical storage tools. They work in living rooms, hallways, bathrooms, kitchens, and children's bedrooms. Measure your chosen wall section, purchase or cut shelves to fit, and mount brackets securely into studs or with appropriate wall anchors.
Stack shelves at intervals of 10-14 inches for books or small bins, or 16-20 inches for taller items like baskets or plants. Staggering shelf depth - wider shelves lower, narrower ones higher - makes the arrangement feel intentional and keeps heavier loads closer to the floor.
Maximize doors with over-door and behind-door organizers
The back of every door in your home is potential storage real estate. Over-the-door organizers that hang from the top of a standard door require no tools and add pockets, hooks, or small shelves instantly. These work especially well in pantries (for spice jars and small packets), bathrooms (for toiletries and hair tools), and bedrooms (for shoes or accessories).
For heavier items, use door-mounted hook rails or wire racks secured with screws through the door itself. Measure door clearance first - some doors swing close to walls or adjacent cabinets, which limits organizer depth.
Use above-cabinet and above-appliance tops
The gap between the top of kitchen cabinets and the ceiling, and the flat tops of refrigerators or wardrobes, are often left completely bare. These surfaces suit labeled boxes or baskets storing seasonal or infrequently used items - holiday bakeware, extra paper goods, spare light bulbs.
Keep items in clearly labeled, lidded containers to protect against dust. Use a step stool with a non-slip base whenever accessing these areas, and never exceed a comfortable reach.
Add a second hanging rod in closets
Standard closets typically have one rod hung at a single height, wasting the space below shorter garments like jackets, folded shirts, and children's clothes. Adding a second rod below the existing one - using a closet doubler rod that hangs from the existing rod, or a separate bracket-mounted rod - can effectively double hanging capacity.
Measure the length of the shortest garments in the closet, then hang the second rod so it clears them by a few inches. This works particularly well in children's closets where clothing is short, and in linen closets where folded items don't need much vertical clearance.
Label Everything at Eye Level
When items move higher up the wall, labels become essential. Use large, clear labels on bins and baskets so any family member can locate and return items without pulling everything down. Consistent labeling also discourages 'mystery boxes' that never get unpacked.
After completing these steps, assess what's working by testing the system for two to four weeks. If items aren't being returned to their designated spots, the placement is likely inconvenient - adjust heights before adding more storage. For families where different members have different habits, strategies for shared household systems can help align everyone around the new arrangement.
If cost is a concern, many of these additions can be achieved with secondhand materials or repurposed items. Budget-friendly storage approaches are worth exploring before purchasing anything new.
Check Rental Agreements Before Drilling
If you rent your home, review your lease before mounting anything to walls or doors. Many landlords require written permission for drilling, and some over-the-door organizers can scratch door frames. Adhesive hooks rated for appropriate weights are often a renter-safe alternative for lighter loads, though their hold varies by wall surface and humidity level.
The content provided on our blog site traverses numerous categories, offering readers valuable and practical information. Readers can use the editorial team’s research and data to gain more insights into their topics of interest. However, they are requested not to treat the articles as conclusive. The website team cannot be held responsible for differences in data or inaccuracies found across other platforms. Please also note that the site might also miss out on various schemes and offers available that the readers may find more beneficial than the ones we cover.