

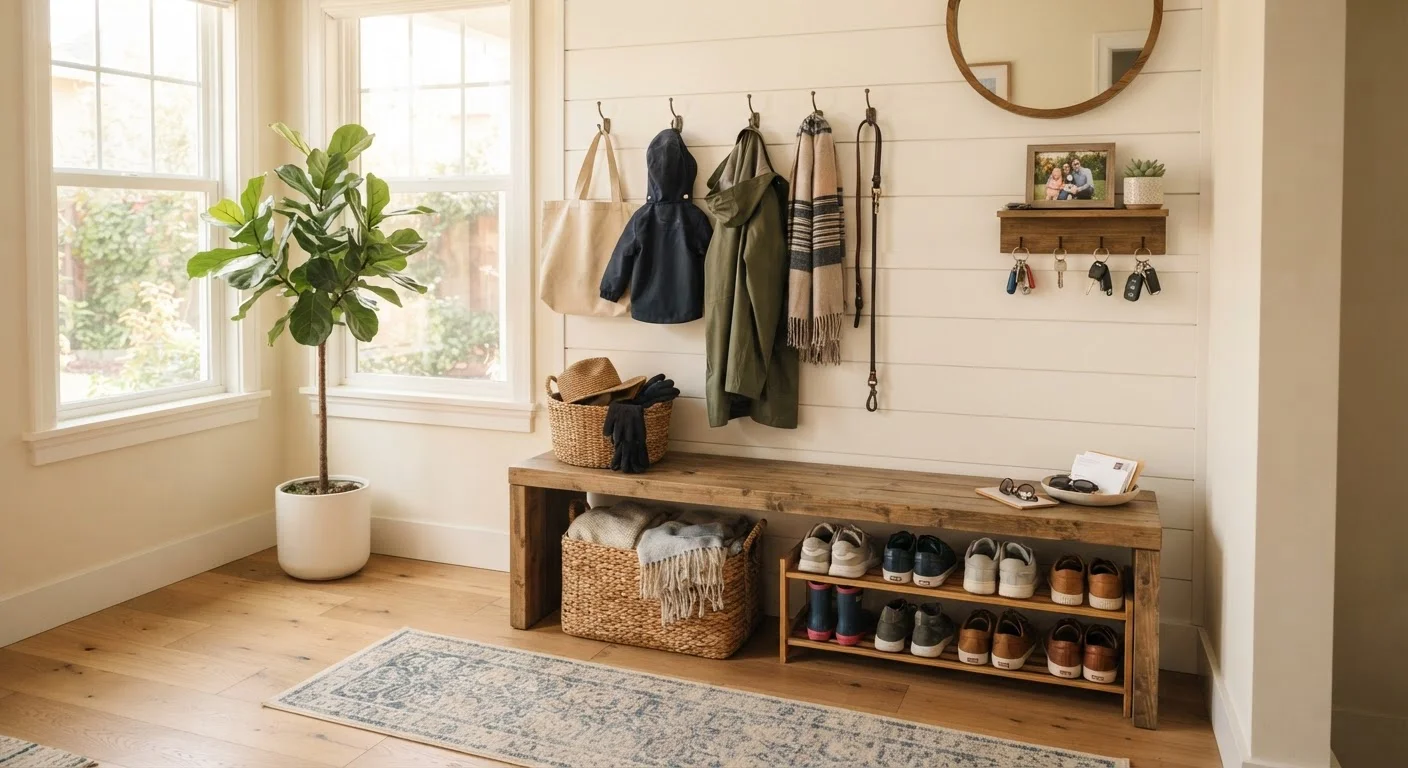
Why Entryways Become Drop Zones
The entryway is where every family member transitions between the outside world and home life - and that transition is almost always rushed. Backpacks land on the floor because there's no hook at the right height. Shoes pile up because the mat fills fast and no one wants to carry them further. Keys get tossed on any flat surface that exists. None of this is a discipline problem; it's a design problem.
Before placing a single hook or basket, it's worth understanding what sequence actually works. Many families jump straight into buying organizers, only to find the clutter returns within a week. That's because organizing clutter doesn't reduce it - decluttering does. Our guide on decluttering vs. organizing explains why order of operations is everything.
The goal here is to create a landing system that works with how your family already moves, not against it. That means low barriers to putting things away, clear ownership of space, and a layout that handles the peak-chaos moments: school mornings and after-work arrivals.
What You'll Need Before You Start
You don't need to spend a lot to get this right. Most entryway transformations rely on a small set of affordable tools and supplies - many of which you may already have.
What you will need
Wall hooks or a hook rail
Provides a dedicated hang spot for coats, bags, and backpacks at the right height for each family member.
Shoe tray or tiered shoe rack
Keeps footwear contained near the door and off the main walking path.
Small basket or bowl for keys and mail
Creates a single, consistent landing spot for small daily-carry items.
Over-door organizer
Uses the back of the front or closet door to store gloves, scarves, or umbrellas without wall installation.
Label maker or adhesive labels
Assigns clear ownership to hooks and baskets so every family member knows their spot.
Slim storage bench
Provides seating for putting on shoes while hiding storage for seasonal items underneath.
Step-by-Step: Building Your Entryway System
Work through these steps in order. Skipping ahead - especially past the clearing and decluttering phase - is the most common reason entryway systems fail within the first month.
Clear Everything Out First
Remove every item currently in the entryway - shoes, bags, mail, sports gear, and any furniture - and place it in an adjacent space. You need a completely empty area to see what you're actually working with. This also forces a reckoning with how much has accumulated.
Sort and Declutter What You Removed
Go through everything you pulled out and sort it into three groups: items that belong in the entryway, items that belong somewhere else in the home, and items to donate or discard. Be honest about what you actually use daily versus what drifts in and never leaves. Shoes no one has worn in months, broken umbrellas, and outgrown backpacks can all go.
Map Out Your Zones
Sketch a simple layout dividing your entryway into three functional zones: a hang zone (coats, bags, backpacks), a drop zone (shoes, boots), and a grab zone (keys, wallet, daily essentials). Even a narrow entryway can support all three if you think vertically. Measure the wall space available for hooks and note any door swing clearances.
Install Hooks and Mount Storage
Mount your hook rail or individual hooks according to your zone map. Use wall anchors appropriate for your wall type - drywall anchors for standard walls, toggle bolts for hollow plaster. A level line ensures hooks are evenly aligned. Position your shoe rack or tray directly at the entrance to intercept footwear before it migrates further into the home.
Set Up the Grab Zone
Place a small bowl, tray, or wall-mounted key rack near the door at adult eye level - but not on a surface where mail and receipts can pile up unchecked. The grab zone should hold keys, transit cards, and similar daily-carry items only. Keep a separate, small basket for incoming mail if needed, and set a weekly habit of clearing it out.
Label Spots and Return Only What Belongs
Assign a hook, shelf section, or basket to each family member. Labels - even simple handwritten ones - dramatically increase how consistently everyone uses their spot. Return only the items that passed the declutter test and belong in the entryway. Everything else goes to its proper home elsewhere in the house right now, not later.
Making It Stick for the Whole Family
The best entryway system is one every family member can use without thinking too hard. That means hooks at the right height for kids, a shoe spot that doesn't require bending awkwardly, and a key location that becomes muscle memory. If one person has to remind others constantly, the system has friction that needs to be designed out - not disciplined out.
Since every household has different habits and rhythms, it helps to think about this space in the same way you'd approach any shared area. Our article on organizing shared spaces for families with different habits covers how to build systems everyone can realistically maintain.
One principle worth anchoring to: the entryway is a zone, not just a hallway. When you treat it as a functional activity area - arrival, departure, storage - it becomes easier to maintain boundaries around what lives there and what doesn't. For a broader look at how zone-based thinking transforms home organization, see our guide to the zone method.
Finally, don't overlook your walls. Vertical space above eye level and the backs of doors can hold a surprising amount - seasonal gear, sport bags, umbrellas - without consuming any floor area. Our article on using vertical storage space shows exactly how to do this without major renovations or large expenses.
The content provided on our blog site traverses numerous categories, offering readers valuable and practical information. Readers can use the editorial team’s research and data to gain more insights into their topics of interest. However, they are requested not to treat the articles as conclusive. The website team cannot be held responsible for differences in data or inaccuracies found across other platforms. Please also note that the site might also miss out on various schemes and offers available that the readers may find more beneficial than the ones we cover.